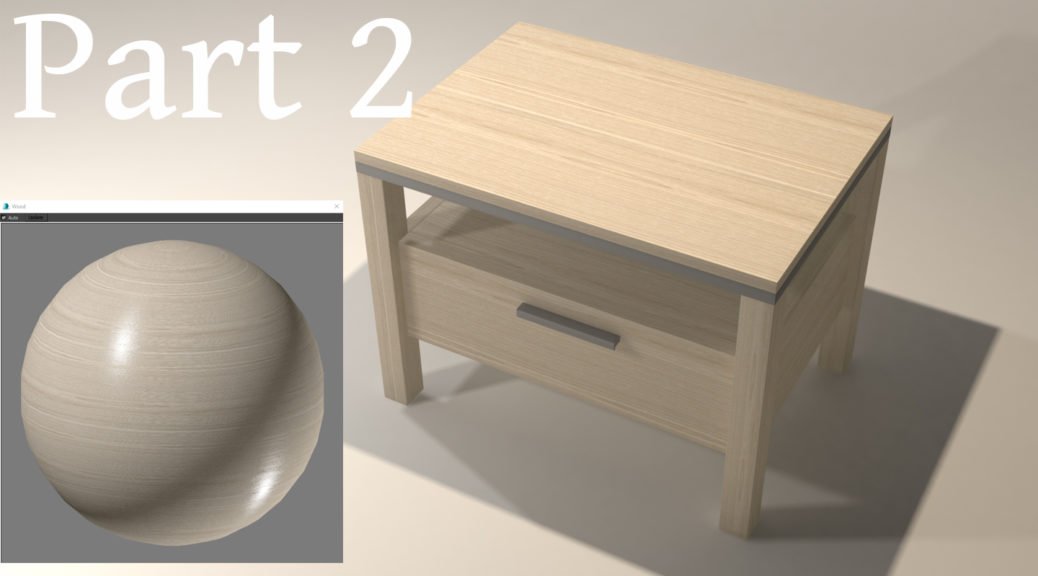
Standard Wood Material in 3ds Max (tutorial part 2)
So we did prepare all of the textures that we need for Wood material in tutorial Part 1. Go see and read it if you haven’t read it already. So we can be on the same page 🙂 So let’s make some wood! 😀 For starters create a simple shape, say a simple box mesh inside your Viewport. (If you use a box mesh don’t forget to apply the UVW Map modifier from modifiers list and choose Box mapping layout) Or load your own model if you have one. Something that would require Standard Wood material. I will use a simple small cabinet model. That way you can see better what the final result would look like on an actual model.
So let’s begin! Let’s create some Standard Wood Material!
Open your Material Editor window (M key on keyboard), select one of the material slots and rename it to Wood material. (Just a friendly tip for future- always rename your materials and maps, so that you and any body else who is going to use your model knows what is where). Once you do that apply this material to your object so you can see changes immediately after adjusting settings.
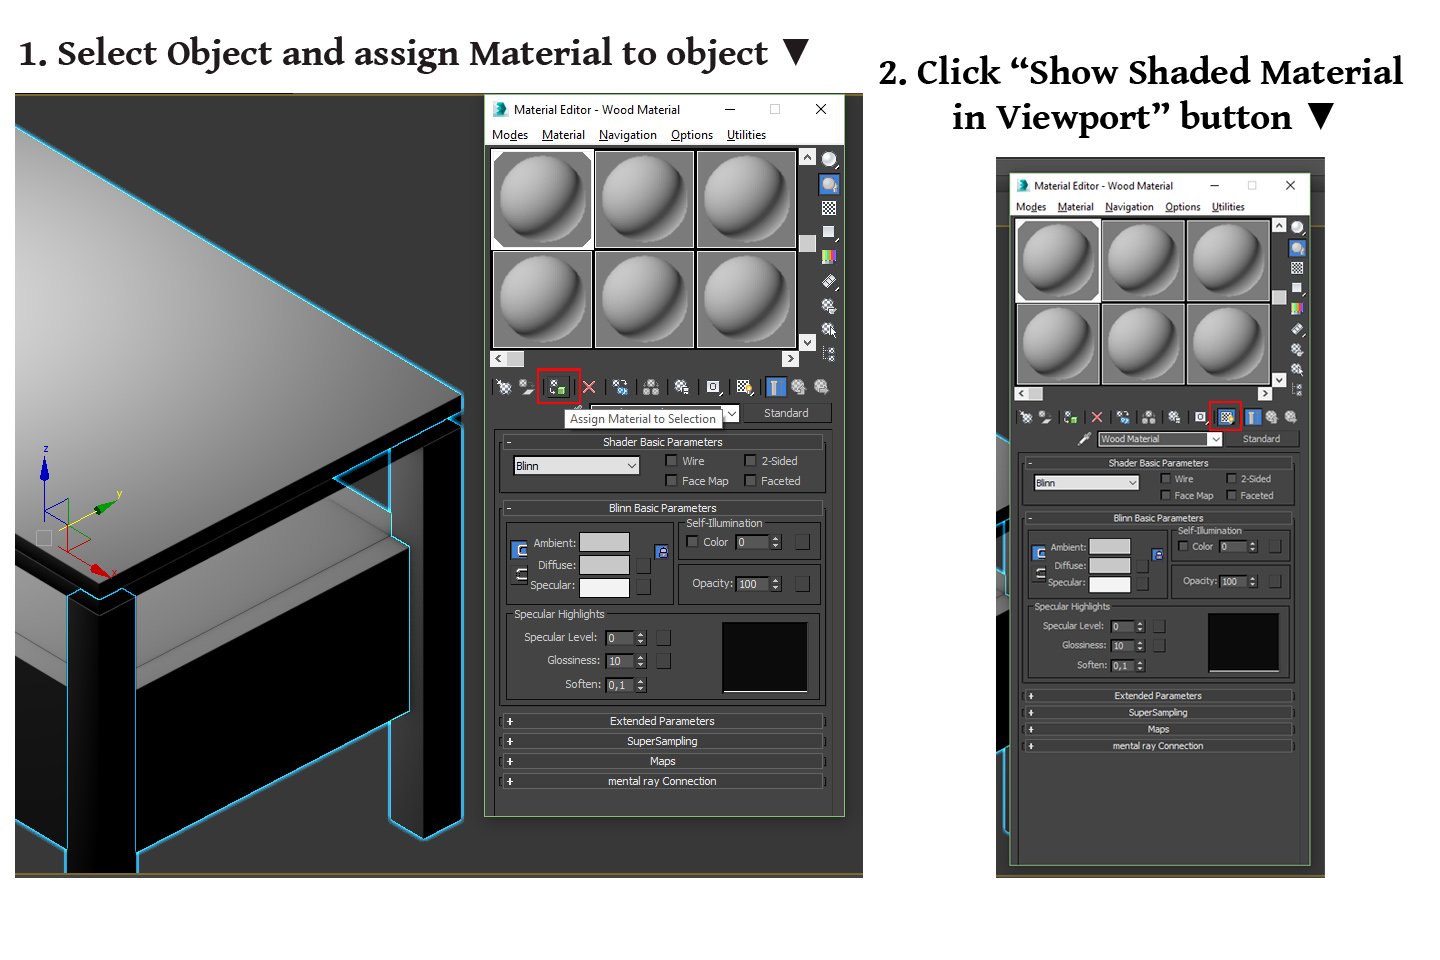
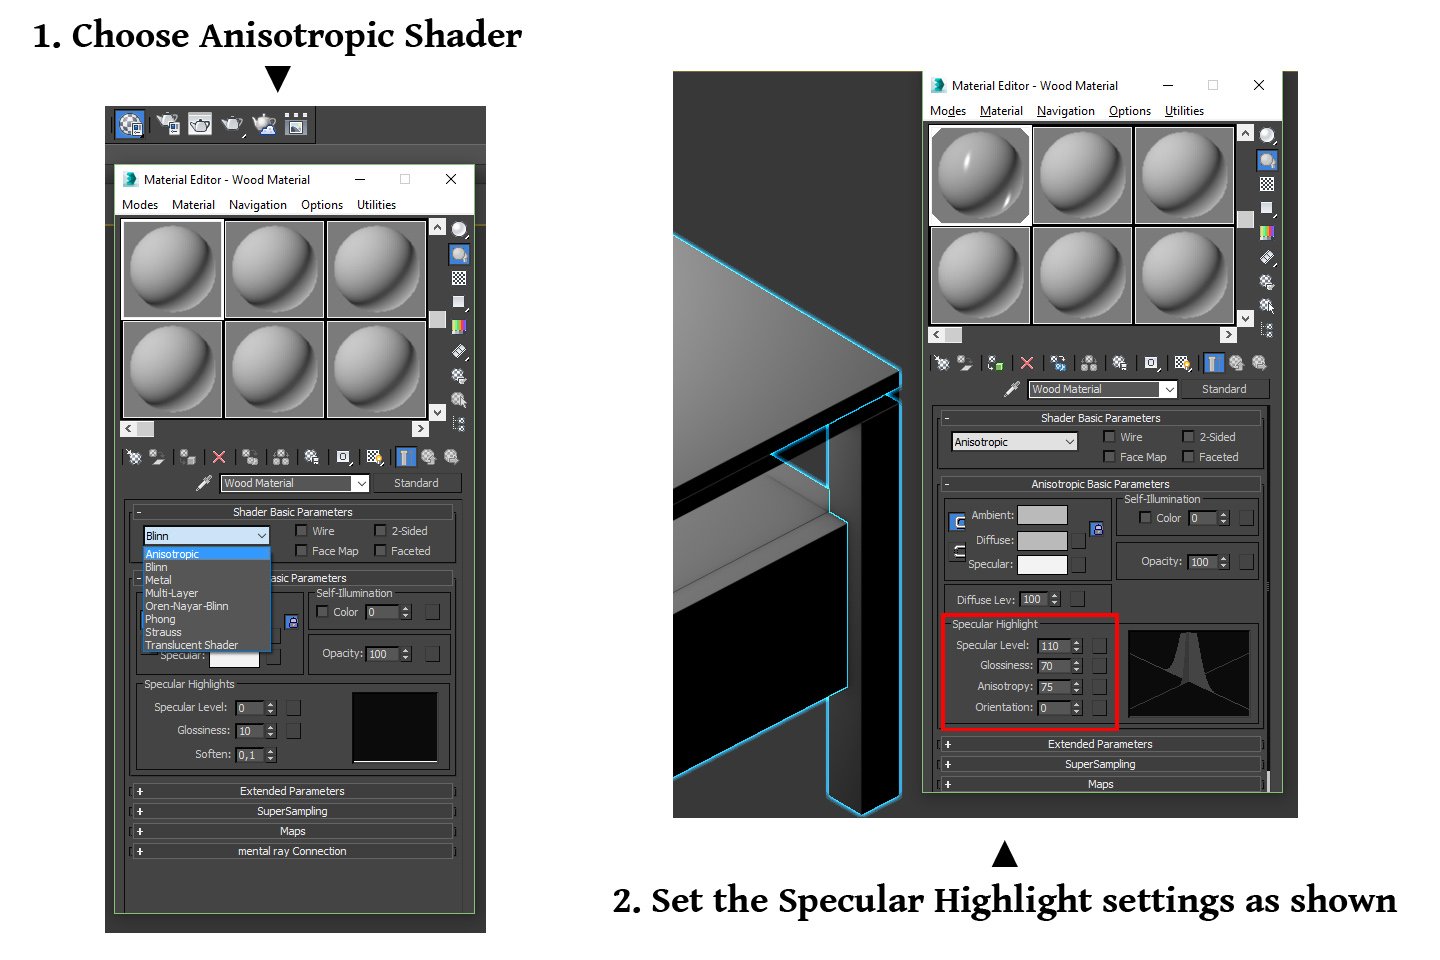
So we can start to tweak our material. Let’s begin with changing the materials Shader from Blinn to Anisotropic. The reason I am using this Shader is quite simple, it gives me the look of wood laminate. What Anisotropic shader does is it creates the surface with elliptical highlights, which gives this uneven look to the surface. It is mainly used to create brushed metal or hair, but it just suits me fine making this Wood material as well 🙂 So let’s set some settings down in Anisotropic Basic Parameters rollout. In the Specular Highlight section set Specular Level to 110, Glossiness to 70, Anisotropy to 75. I left Orientation parameter at 0.
Adding texture maps
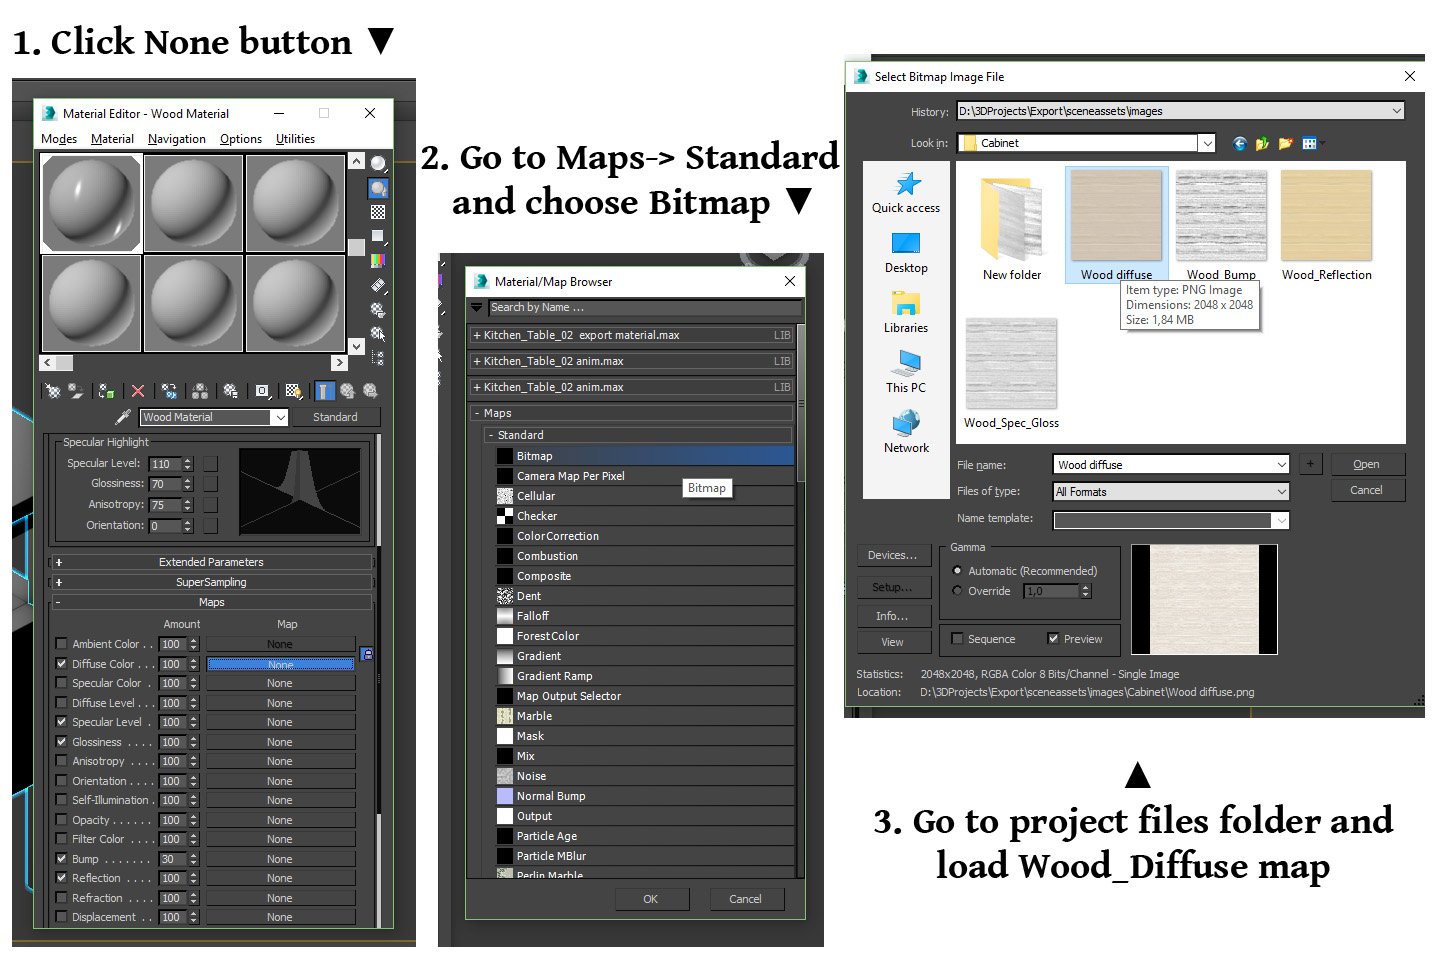
Now let’s load all the nice texture maps we’ve made in the previous tutorial. Expand the Maps rollout. On the left side check the boxes of the maps we will use: Diffuse, Specular Level, Glossiness, Bump and Reflection. (It is not a must, you can load any texture without doing that and the box will check automatically. Just for now it will be easier to know where to load what).
So first let’s load a Diffuse map. Click on None button next to the Diffuse parameter. The Material/Map Browser will pop up. Under Maps choose Standard-> Bitmap. The File Explorer will then open. Go to the 3ds Max project files folder (where we saved all the maps in the previous tutorial) select Wood_Diffuse image and click Open.
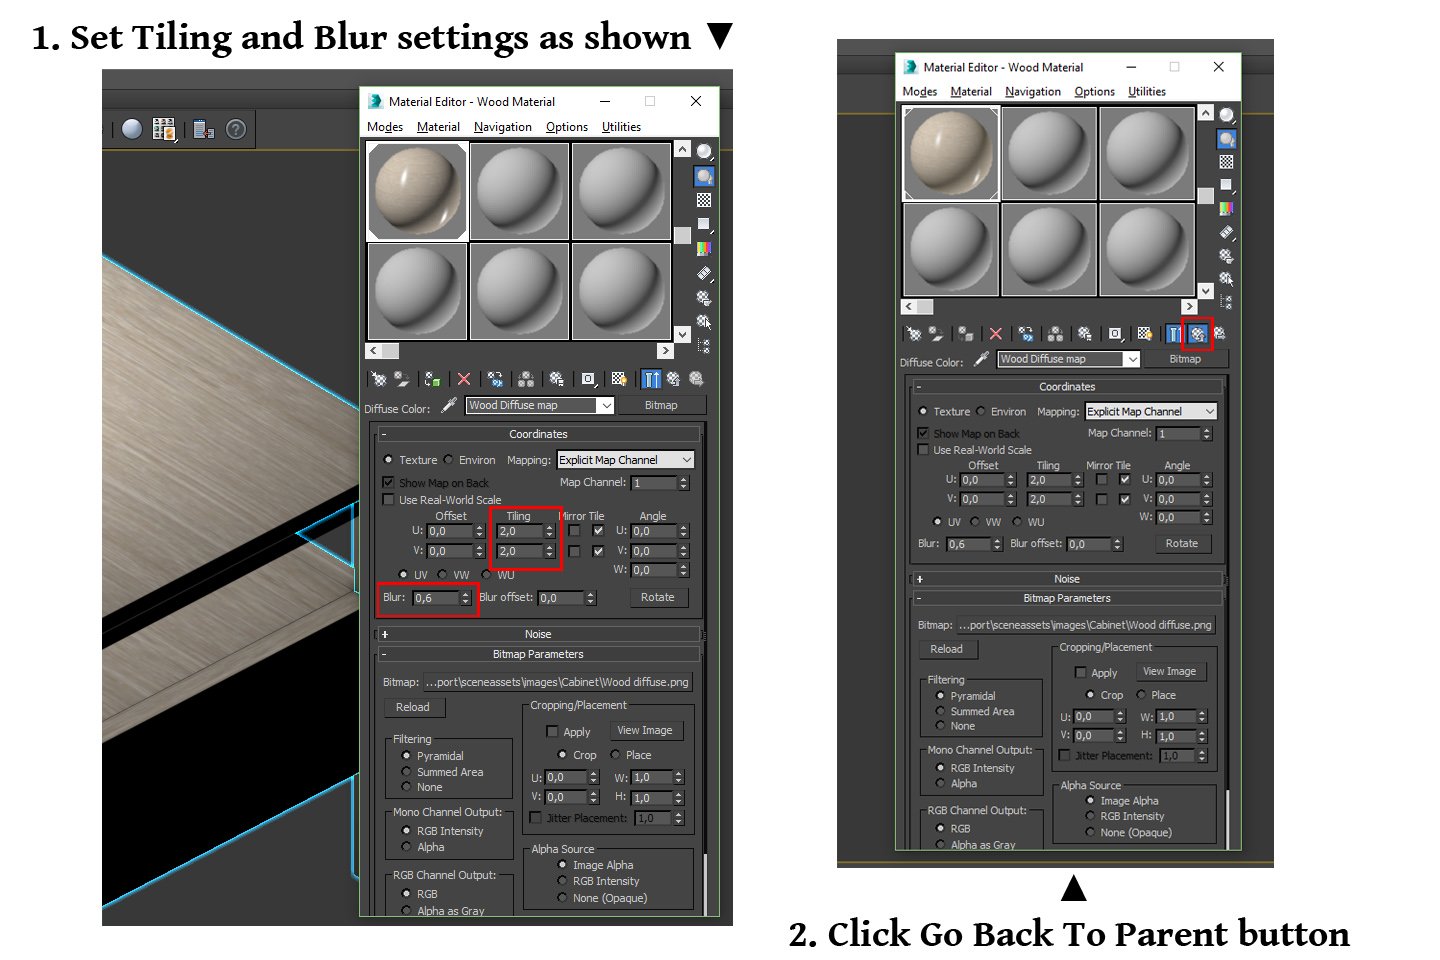
It will automatically open the Wood_Diffuse map parameters window. Change the map name to “Wood Diffuse map”. Inside set Tiling parameter on both U and V to 2.0. Set the Blur option to 0.6. And we are done with the Diffuse map. Go back to Maps Rollout by clicking Go To Parent button. Repeat the whole procedure by loading all the other maps to their proper slots.
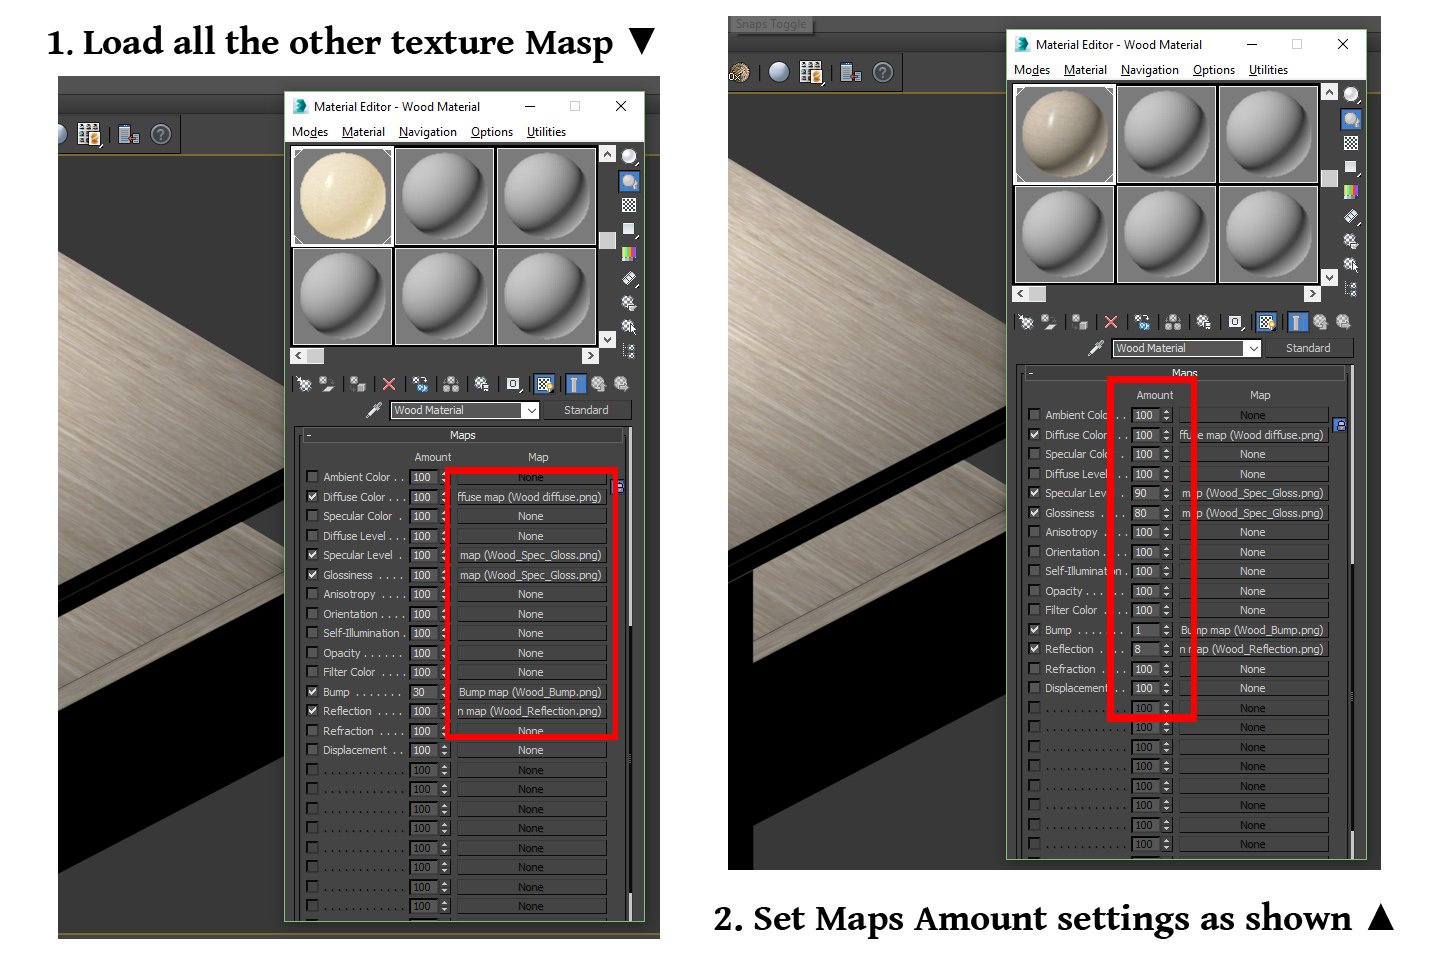
After loading all the texture maps there’s one more thing left to do to complete this Wood material. Set the Amount of each Map. Leave Diffuse Color map by 100. Set Specular Level to 90, Glossiness to 80, Bump to 1.0 and Reflections map to 8.0.
And our simple Standard Wood Material is done!
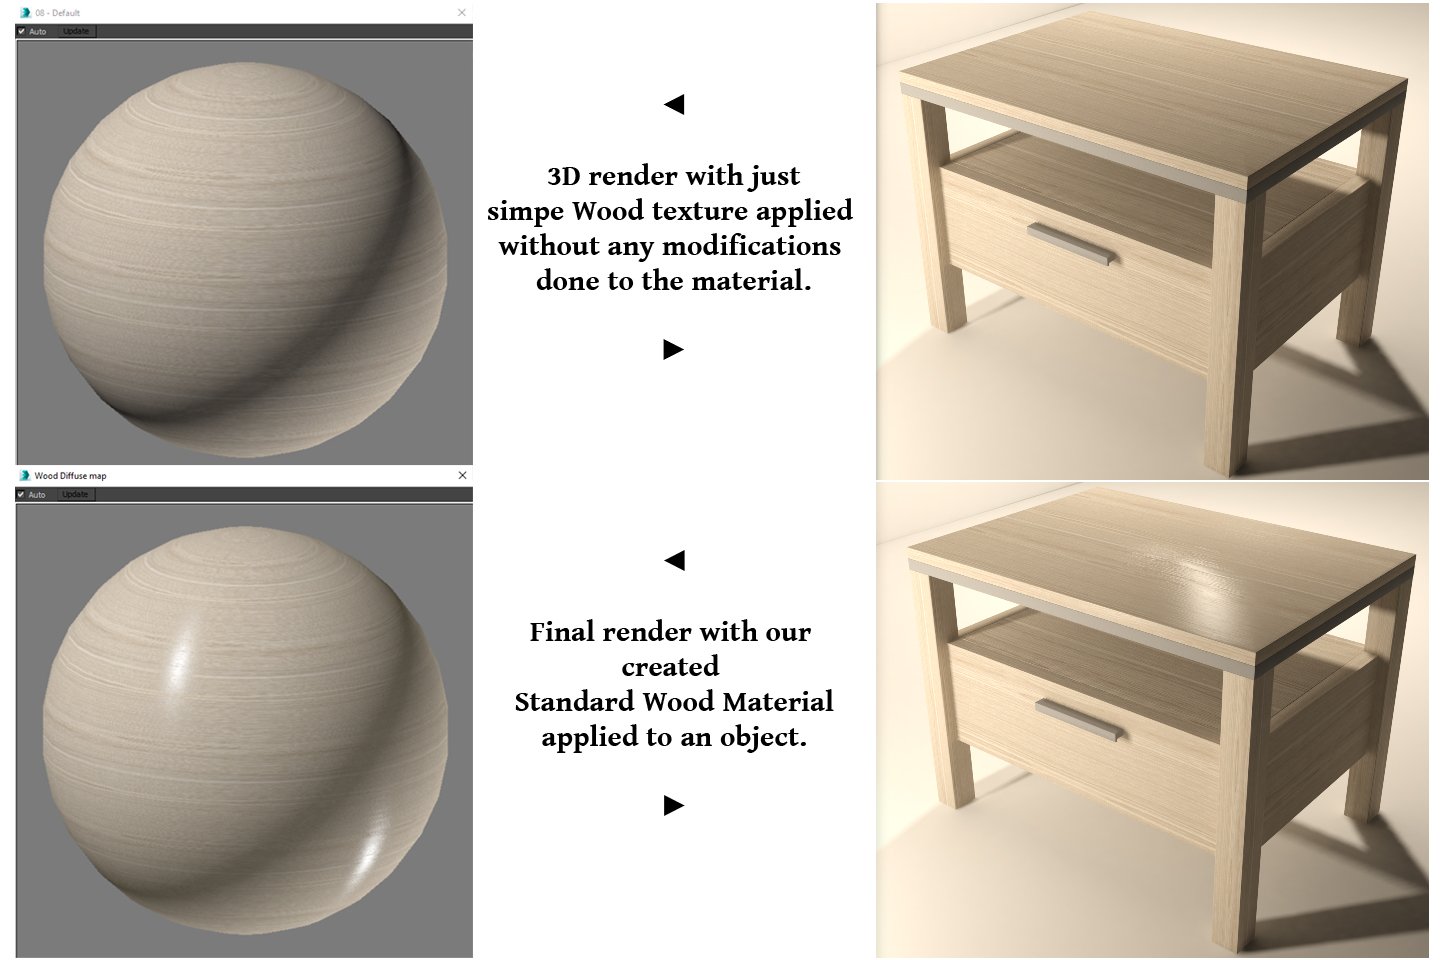
To comparison below are two different rendered images. As you can see they are both rendered in the same scene, using the same lighting and same rendering settings. On the upper side is 3D render with just simple wood texture applied to the object, no tweaking was done at all, just Standard Material, Blinn Shader and Wood Diffuse map uploaded. On the lower side is 3D render with our made Standard Wood Material. You can see the difference. Image on the top is very flat and lifeless. It doesn’t look bad, just a bit dull. On the other hand the bottom image is more life like. You can see how the light bounces from the surface and how uneven it is. Please note: different wood textures would give a different taste and look even with the same material settings. Experiment and see for yourself 🙂 It is the most fun in 3D just to explore, find and learn new thing!
So this is my simple beginners tutorial for Standard Wood Material. Hope I could help for some of you!
Subscribe for my website for more Simple tutorials!

Share Me!
4 thoughts on “Standard Wood Material in 3ds Max (tutorial part 2)”
thank you so much for sharing all these information with us,
i was searching the web, since morning for such information,
thanks alot
you’re welcome!:)
Really useful…
Thank you .
THANK YOU SO MUCH …..